前言
当服务器计算任务完成之后,为了让我们能够及时收到任务信息,可以使用 WxPusher 等工具来推送消息。
WxPusher 管理后台配置
我们首先需要在 WxPusher 的管理后台进行配置,主要步骤如下:
在后台管理 中注册应用,获得 appToken
新建主题,需要接收推送消息的人扫码订阅,获取接收者 UID
使用 api 接入,发送 get 或者 post 消息即可
详细过程见官方文档 ,在此不再赘述。
配置完成后,我们需要获取的必要信息为:appToken 、UID 。
Python 脚本调用 WxPusher 实际使用过程中该脚本还存在问题,对于某些任务完成后并不会推送,有待进一步修正
python 脚本如下,将以下内容写入 wxpusher_notification.py ,在对应位置替换你自己的 appToken 和 UID
1 2 3 4 5 6 7 8 9 10 11 12 13 14 15 16 17 18 19 20 21 22 23 24 25 26 27 28 29 30 31 32 33 34 35 36 37 38 39 40 41 42 43 44 45 46 47 48 49 50 51 52 53 54 55 56 57 58 59 60 61 62 63 64 65 66 67 68 69 70 71 72 73 74 75 76 import requestsimport jsonimport sysimport osimport redef get_current_jobid (): id_content = os.popen("qstat" ).read() pattern = re.compile (r'^\d{1,}.hpc' , re.MULTILINE) result = pattern.findall(id_content) pending_jobid = [ re.findall("^\d+" ,i)[0 ] for i in result ] for jobid in pending_jobid: current_dir = os.getcwd() jobdetail_info = os.popen("qstat -f " + str (jobid)).read() pattern = re.compile (current_dir) if re.search(pattern,str (jobdetail_info)): return jobid def get_job_detail_info (jobid, jobinfodic ): query_lst = ["Job_Name" , "job_state" , "total_runtime" ] os.system("qstat -f " + str (jobid) + " > job_info.log" ) for line in open ('job_info.log' ): if query_lst[0 ] in line: jobname = line.split("=" )[1 ].strip() jobinfodic["jobname" ] = jobname elif query_lst[1 ] in line: jobstate = line.split("=" )[1 ].strip() jobinfodic["jobstate" ] = jobstate os.system("rm job_info.log" ) return jobinfodic def send_mesg (jobinfo_dic, url, app_token, uids ): jobinfo_tup = (jobinfo_dic["jobid" ], jobinfo_dic["jobname" ], jobinfo_dic["jobstate" ], jobinfo_dic["jobdir" ]) main_body = "# job has finished on hpc \n **job id** \t %s \n **job name** \t %s \n **job states** \t %s \n **job workdir** \t %s" %jobinfo_tup content = {"appToken" : app_token, "content" : main_body, "summary" :"job " + str (jobinfo_dic["jobid" ]) + " has finished on hpc" , "contentType" :3 , "uids" : [uids], "url" :"http://wxpusher.zjiecode.com" } content = json.dumps(content) r = requests.post(url, data=content, headers={'Content-Type' : 'application/json' }) return def main (): url = "http://wxpusher.zjiecode.com/api/send/message" app_token = "your app_token" uids = "UID_xxxxxxxxxxxxxxxxxxx" jobinfo_dic = {} jobinfo_dic["jobid" ] = get_current_jobid() jobinfo_dic["jobdir" ] = os.getcwd() get_job_detail_info(jobinfo_dic["jobid" ], jobinfo_dic) send_mesg(jobinfo_dic, url, app_token, uids) if __name__ == '__main__' : main()
给 wxpusher_notification.py 添加写权限
1 chmod +x wxpusher_notification.py
将 wxpusher_notification.py 移动至环境目录下
1 mv wxpusher_notification.py ~/.loca/bin
PBS 提交脚本配置
pbs 提交脚本的模板如下
1
2
3
4
5
6
7
8
9
10
11
#!/bin/bash MPIRUN_COMMAND wxpusher_notification.py
即在原有的 pbs 提交脚本最后添加 wxpusher_notification.py
任务推送测试
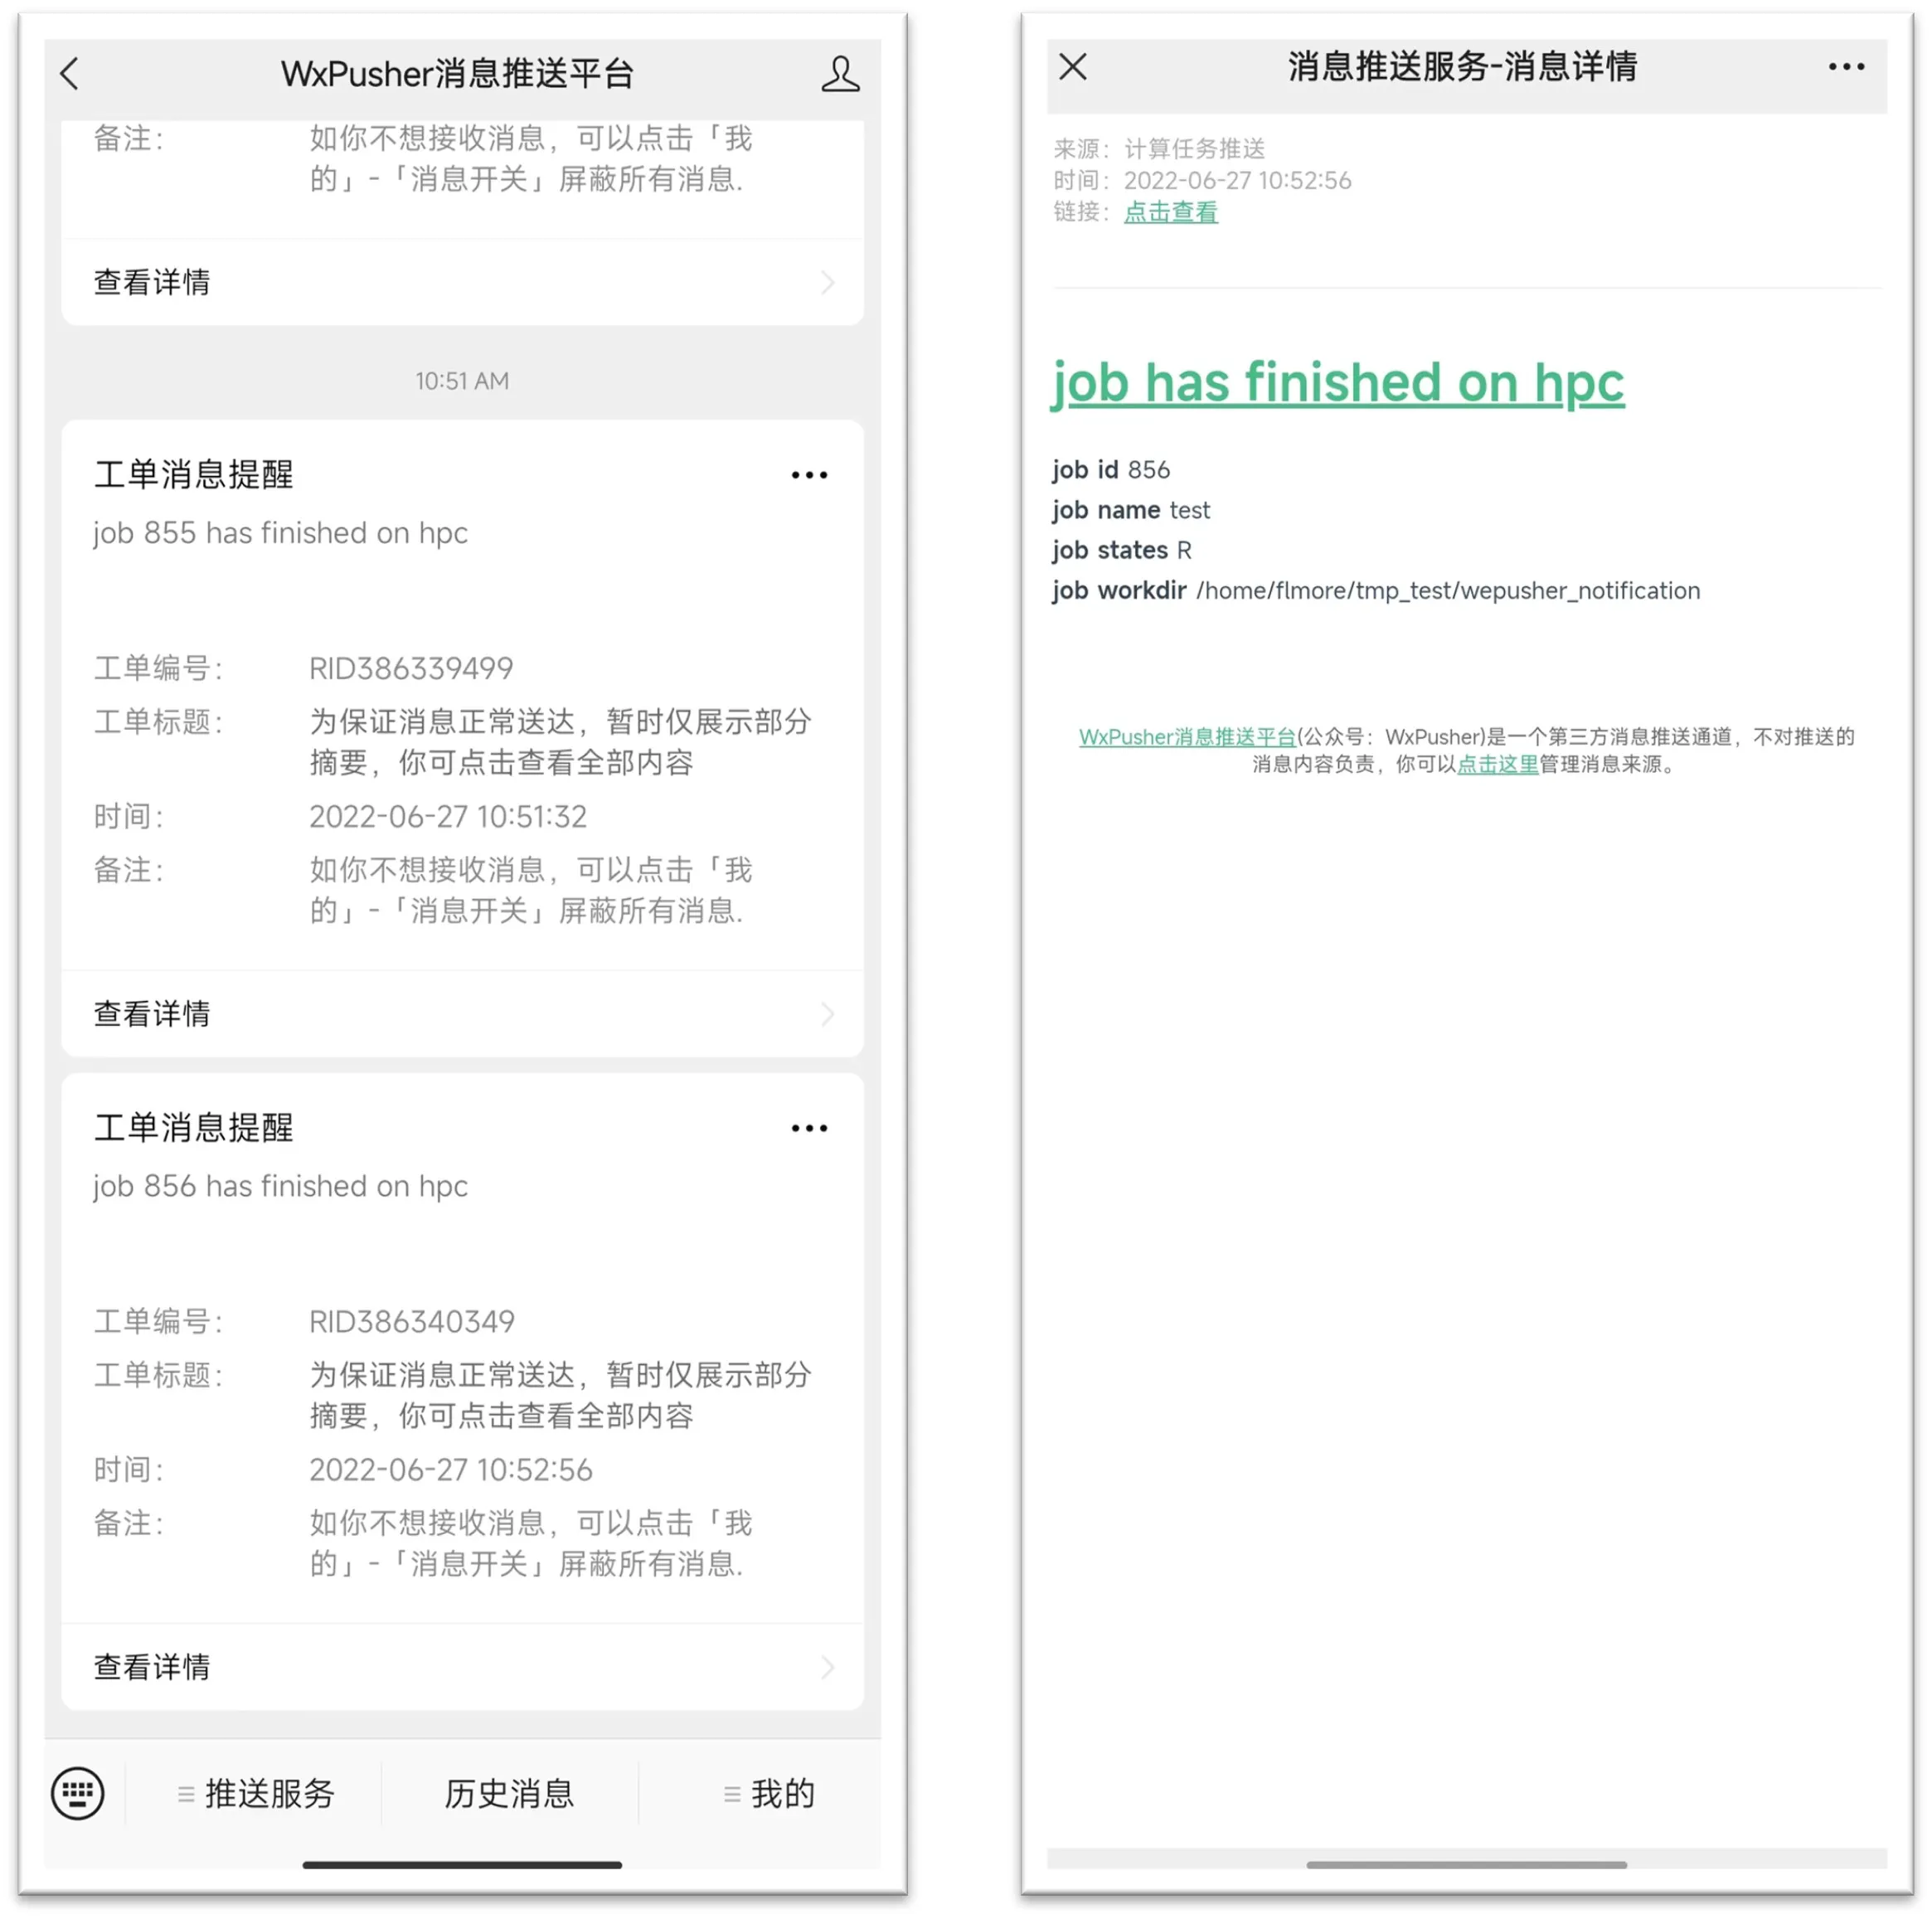
通过上面的步骤配置好后,任务完成后,在微信端就可以接收到消息了。
参考文献
[1] 计算任务的推送 (cheng-group.net)
